Ukrainian palyanitsa. Ukrainian Palyanitsa - beneficial properties and calorie content For strawberry puree with sour cream
Ukrainian palyanitsa with cottage cheese and herbs

Today I will show you a long-forgotten recipe for palyanitsa. That's what they call it in the region where I live. Prepared in a matter of minutes, it can replace bread and help diversify your daily table.
Palyanitsa is a Ukrainian flattened round bread made from wheat flour. It has the shape of a flat cake. It is prepared with kefir, with the addition of soda, which gives incredible lightness and airiness to the dough.
(There are several definitions of this type of bread. One of them says that palyanitsa is bread whose shape is flattened, rounded, usually with a characteristic “peak” of crust on top, formed due to a cut before baking. There is even a GOST for baking such bread , but at the present time I have never encountered it, and it is completely different from the recipe that I will tell you about)
Depending on what time it was and what was on the table, Ukrainian housewives baked palyanitsa with green onions, eggs and dill, salted cottage cheese or mashed potatoes with herbs and cracklings. Or without filling at all, accompanying a slice of warm palyanitsa with rich sour cream or cream.
It is prepared in a frying pan, which allows the cooking time to be reduced significantly compared to an oven or oven, and does not allow the dough to dry out, leaving it moist and soft.
The taste of this bread is very pleasant and delicate. The dough is the most tender, not at all “clogged” and “stuffy”. Indeed, it is, as Nomis said, like fluff..
Now that the garden bed is full of green onions and dill, it would be a shame not to take advantage of this. To “support” the greens, I added good, very rich homemade cottage cheese. It goes well with dill, makes the filling juicy, and complements it with its salty, slightly sour taste.
Special thanks to my mother-in-law for helping me recreate the recipe. In my house, we have never baked palyanitsa (I don’t even know why), but my mother-in-law often makes them, only now in the form of small portioned pies.
Preparing palyanitsa takes little time, but the result is surprising in its simplicity and harmony.  So let's get started. To prepare 5-6 pcs you need:
Dough:
- Kefir - 250 ml
- Soda - 0.5 tsp
- Salt - 0.5 tsp
- Egg yolk - 1 pc.
- Flour - 250-300 g
- Vegetable oil for frying - 2 tbsp
- Mix kefir with yolk and salt. Add soda (do not extinguish!). Gradually add flour in portions and knead the dough. Leave to rest while the filling is prepared.
- Be careful! The dough should remain very soft and slightly stick to your hands. This will allow the baked palyanitsa to be very tender and elastic. Don't turn into a hard crust.
- Look at the consistency of the dough - it should be such that you can easily roll it out, dusting the layer with flour from time to time.
For filling:
- Fat cottage cheese - 400 g
- Dill -1 small bunch
- Green onions - a few feathers
- Yolk - 1 pc.
- Salt - to taste

2. Add salt and chopped herbs 
Shaping and frying:
- Divide the dough into 5-6 pieces. Roll each one out to a thickness of 0.5 - 0.8 cm.
- Place a few tablespoons of curd mass in the middle.
- Gather the dough around the filling and pinch.
- Flatten the palyanitsa with your hands, thereby giving it a flat shape. Then roll it out a little more using a rolling pin. The dough should be thin. On one side it will show through the filling. That's how it should be.
- Carefully place the flatbread in a slightly heated frying pan with vegetable oil. Bring this side until golden brown. Turn over and cover with a lid. Keep until ready. This will take no more than a minute.
Ready! Bon appetit!
Another wonderful recipe from the Soviet culinary heritage. Beautiful and tasty. Try it!
For the recipe you will need:
For the dough:
225 g premium flour
0.5 teaspoon dry instant yeast (this yeast does not require pre-soaking and is added directly to the flour)
For the test:
50 g milk
10 g sugar
10 g vegetable oil
For flour brew:
1 tablespoon flour
100–150 ml water
PREPARATION:
For the dough, mix flour with dry instant yeast (let me remind you that instant yeast does not require pre-soaking and is added directly to the flour, and if you prepare bread with dry active or fresh yeast, you must first dissolve it and check for germination).
Gradually adding water, knead a fairly dense dough. The requirements for the dough are minimal, you don’t need to knead or knead it for a long time, it’s enough just to achieve homogeneity.
Round the dough, cover and leave in a warm place to ferment. The fermentation time of the dough depends very much on the temperature, the amount of yeast, and their activity and can range from 3 to 5 hours. It is customary to judge the readiness of the dough by its appearance - a mature dough will double or even triple in volume, its surface will be covered with bursting bubbles and folds and a simply divine bread aroma will appear.

For flour brew, stir flour with water until you obtain a homogeneous, very liquid dough, and then gently heat until the starch gelatinizes (until a liquid jelly forms). Let stand for 2 - 3 hours at room temperature.

Make a hole in the center of the mature dough and add the water, milk, salt, and sugar required by the recipe. Stir until the salt and sugar dissolve. Add flour and knead everything into a bowl into a dough. Knead the kneaded dough for 3 - 4 minutes until smooth, and then gradually, in small portions, beat vegetable oil into the dough.

Place the kneaded dough on a dry work surface (without flour) and knead thoroughly until smooth (5 - 7 minutes).
Round the prepared dough, cover and leave in a warm place until it doubles in volume.
Place the risen dough on the work surface (upper side down) and round. To do this, gather the edges of the dough towards the center until a smooth surface is formed on the outside. Place the rounded dough (seam side down) on a dry work surface, cover and leave for 20 minutes to pre-proof.
Using a twisting motion, form the dough into a smooth ball, pinch and roll up the seam.
According to GOST, Kyiv palyanitsa is baked in molds with a diameter of 21 cm and a depth of 9 cm, but I adapted to baking it in a regular pan. In my opinion, it’s simple, convenient and always at hand.
Grease the inside of the pan generously with vegetable oil. Line the bottom with baking paper and lightly grease the top with vegetable oil.
Place the formed bread, cover and leave for 1 – 1.5 hours for final proofing.

In this recipe, the proofing should be maximum, since only in this case the palyanitsa will not crack on the top or side when baking. You can determine the degree of proofing by lightly pressing on the dough: if the mark disappears, the proofing is insufficient; if, when pressing, the hole falls through, then it is excessive and such dough may settle during the baking process; Ideally, the fingerprint should straighten, but very, very slowly.

Before placing in the oven, grease the top of the palyanitsa with flour tea leaves.

Lightly spray the lid with water and cover the pan.
Place the pan with the dough on a hot baking sheet in an oven preheated to 240 C. After planting, reduce the temperature to 220 C and bake the bread until fully cooked and golden brown (about 40 minutes). After 10 minutes from the start of baking, remove the lid.
Immediately after baking, remove the palyanitsa from the mold and place on a wire rack.

You can cut it no earlier than after 40 - 50 minutes.
Enjoy your meal!
She sent us the story and recipe for the flatbreads. Oksana, 36 years old, from Simferopol. Next, a word to her, and then my photos and preparation of the recipe.
“I had a great-grandmother, her name was Natalya, but in childhood my cousin and I simply called her Baba Osya. I only later understood why Osya is from her patronymic Osipovna. My grandmother Osya was born in 1904. She survived the famine and lost two children who died of hunger and she only had daughter Polina left - my paternal grandmother.
After the war, grandmother Polina married my grandfather, who was a military man. Their family was sent to Germany, to a military camp, and Grandma Osya lived there with them for some time. Great-grandmother has seen a lot in her life, both good and bad, but no matter what she did not lose her sense of humor! She was also an artist!
For example, in Germany there was a case: a woman Osya was choosing fabric in a German store, and the seller said to her: “Gut?”, the woman Osya does not know German and just waves her head and says: “Gutee!”, they say, it’s better! She could put a man's jacket on a mop and put a fur hat on top and sit this “construction” at the table, on which she put the sleeves from the jacket, and on the table an ashtray with a cigarette: in this way my great-grandmother imitated the presence of someone at home in case no one at home! “The thieves will see through the window that a man is sitting and smoking in the kitchen and will not break in!” Baba Osya reasoned. She was cheerful and loved us all very much, and we loved her too!
Also, my great-grandmother has never taken a single pill in her entire life! When she was already 75 years old, she accidentally drank a glass of vinegar essence in one gulp! She was in intensive care, and then, so to speak, in the “mortal” ward. Baba Osya not only survived. but she also lived without any tubes, etc. another 15 years!
My great-grandmother passed away when I was already 14 years old! She worked and ran until the very end! I have only warm memories of her.
I also remember her for the fact that she could cook the simplest dishes very tasty. She’ll cook simple noodles or vermicelli, it seems like nothing fancy, but she’ll cook them so well that you can safely eat only them!
And she also left behind a very simple, but VERY tasty recipe for a dough dish. She called this dish “Palanitsy” (Palanitsy), so I got used to this name. What's most interesting is that the dough is very simple: water, flour, salt! Without eggs, kefir, etc. We tried it differently - it wasn’t the same!
In general, Palyanitsy are flat cakes with filling. The filling can be very different: stewed cabbage, rice with boiled egg and onion, etc., but my favorite ones are with potatoes!
Palyanitsy is now my signature dish! Not only does our family love them, but our friends always ask us to make them. Therefore, when we gather with a group of friends at our place or with friends, Palyanitsa are a very common dish on our table. They are especially delicious served with sweet tea!
You can eat them both hot and cold. Personally, I love it when they cool well - then their taste is better felt. In general, it's a matter of taste...
When the whole family gathered with my grandmother in the summer, she always prepared amazingly tasty and fluffy palyanitsa. Palyanitsa (Palyanytsya (Ukrainian))- Ukrainian dish. Palyanitsa was prepared instead of bread to diversify flour dishes. It is prepared very quickly, and many people like its taste. Depending on the season and dish, palyanitsa can be eaten instead of bread with soup or with meat; it goes perfectly with kebabs. You can take it with you to the dacha. And during berry season, it will be a great addition to berry puree. The delicious taste of palyanitsa with honey, apples and poppy seed filling. There are various options for preparing it. We will prepare palyanitsa with matsoni, although yogurt, kefir, and yogurt will easily work here.
Ingredients
To prepare the palyanitsa we will need:
1 glass of matsoni;
1 tsp. (without a slide) baking soda;
0.5 tsp. salt;
1 chicken egg;
2.5 cups flour;
vegetable oil for frying.
For strawberry puree with sour cream:
500 g peeled strawberries;
0.5 cups sugar;
0.5 cups sour cream.
Cooking steps
I often make matsoni myself; it tastes like kefir. But if you have yogurt (or kefir, or yogurt), then you can make palyanitsa from them.
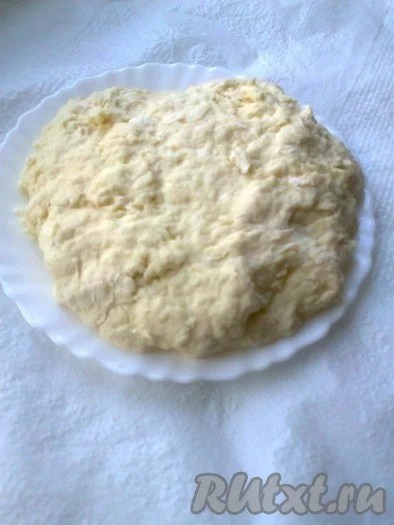
Add baking soda to the matsoni, salt to taste, add an egg, stir and leave for a couple of minutes until foam appears.
Add flour to make a soft dough (softer than dumplings). The softer the dough, the more magnificent the palyanitsa.
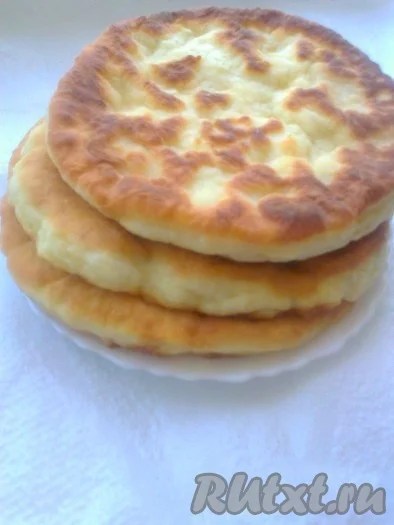
 Divide the dough into three parts. Using a rolling pin or your hands, form 3 circles about 0.5-0.7 cm thick.

You can prick them with a fork to prevent the dough from swelling too much. Heat a frying pan with vegetable oil. Vegetable oil for frying should cover the pan in a thin layer. Reduce heat (slightly less than medium) and fry in vegetable oil on both sides for 2 minutes until browned (or covered over low heat for 3 minutes).
 During the strawberry season in Ukraine they prepare strawberry puree with sour cream - “machanka”.
Wash the berries and remove the stems. Crush using a masher (not a blender). You should be able to feel the strawberry pieces.


Dip palyanitsa in strawberry puree (machanka)
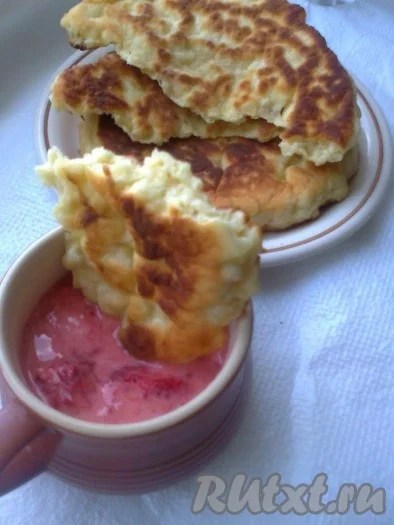
and eat it together with “machanka”.
 Or prepare poppy seed sauce: steam the poppy seeds with boiling water, drain the water and grind the poppy seeds with sugar (for half a pack of poppy seeds you need half a glass of sugar, add 1 glass of warm boiled water and a couple of spoons of honey (optional)). Dip warm flatbreads into sauce!!!
Or you can sprinkle with caramelized apples: cut the apples into 1*1 cm cubes. Melt the butter in a frying pan. Add sugar. Stir for one minute. Add apple cubes. Stir vigorously until the fruit softens and darkens.

Nutritional value and composition of Ukrainian palyanica
Ukrainian Palyanitsa contains the largest amount of such substances as vitamin PP, which provides 16.5% of the daily requirement required by the human body, vitamin B1 - 13.3%, choline - 10%. The composition of microelements differs in chlorine - 39.1%, sodium - 34.8%, phosphorus - 11.8%, as well as vanadium - 165%, manganese - 40%, iron - 11.7%. All these elements are a necessary daily requirement for any person.
100g of Ukrainian palyanitsa contains:
- Water – 34.5.
- Proteins – 7.9.
- Fats – 0.9.
- Carbohydrates – 50.2.
- Kcal -246.
The bakery product Ukrainian palyanitsa is a soft bread, with a dense porous crumb and a crispy crust. Suitable for all dishes without exception. But since this is a fairly high-calorie product, you need to remember this, especially for people prone to obesity.
Cooking Ukrainian palyanitsa at home
Ingredients:
- Sugar – 2 teaspoons.
- Premium wheat flour: dough – 150g, dough – 500g.
- Dry yeast - 1 level teaspoon.
- Water: for dough – 100 ml, for dough – 125 ml.
- Milk 2.5% fat – 50 ml.
- Sea salt – 1 level teaspoon.
- Refined vegetable oil – 1 tablespoon.
Preparation:
- Late in the evening, prepare the dough: mix 150g of flour with yeast, 100ml of water and knead the dough (soft). Cover the bowl with a lid and leave in a warm place until the morning.
- In the morning, mix the remaining water, milk, sugar, salt, vegetable oil and add the dough. Mix everything and gradually, adding flour, knead the dough so that it is elastic.
- Form a ball, place in a bowl, cover with cling film and let rise for 3 hours.
- After it has risen, place the formed ball on a baking sheet sprinkled with flour and let it rise for another hour. After this, make a cut along the palyanitsa and place in the oven, heated to 190º C, bake for 45 minutes.
- Wrap the finished palyanitsa in a towel and leave for an hour. Bon appetit!
 Salad with eggplant and beans for the winter: recipes
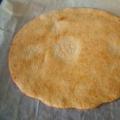 Wonderful cake How to make honey cake in a water bath
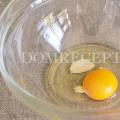 Excellent choux pastry for dumplings and dumplings: culinary recipe